Add data
The add data tool allows users to import external data sources and display them in the map viewer. Users can either use an online data source via URL or upload a file to be displayed. NB: The search function within Add Data is currently disabled.
How to use
Add data via file
- Open the Add Data tool from the tool menu
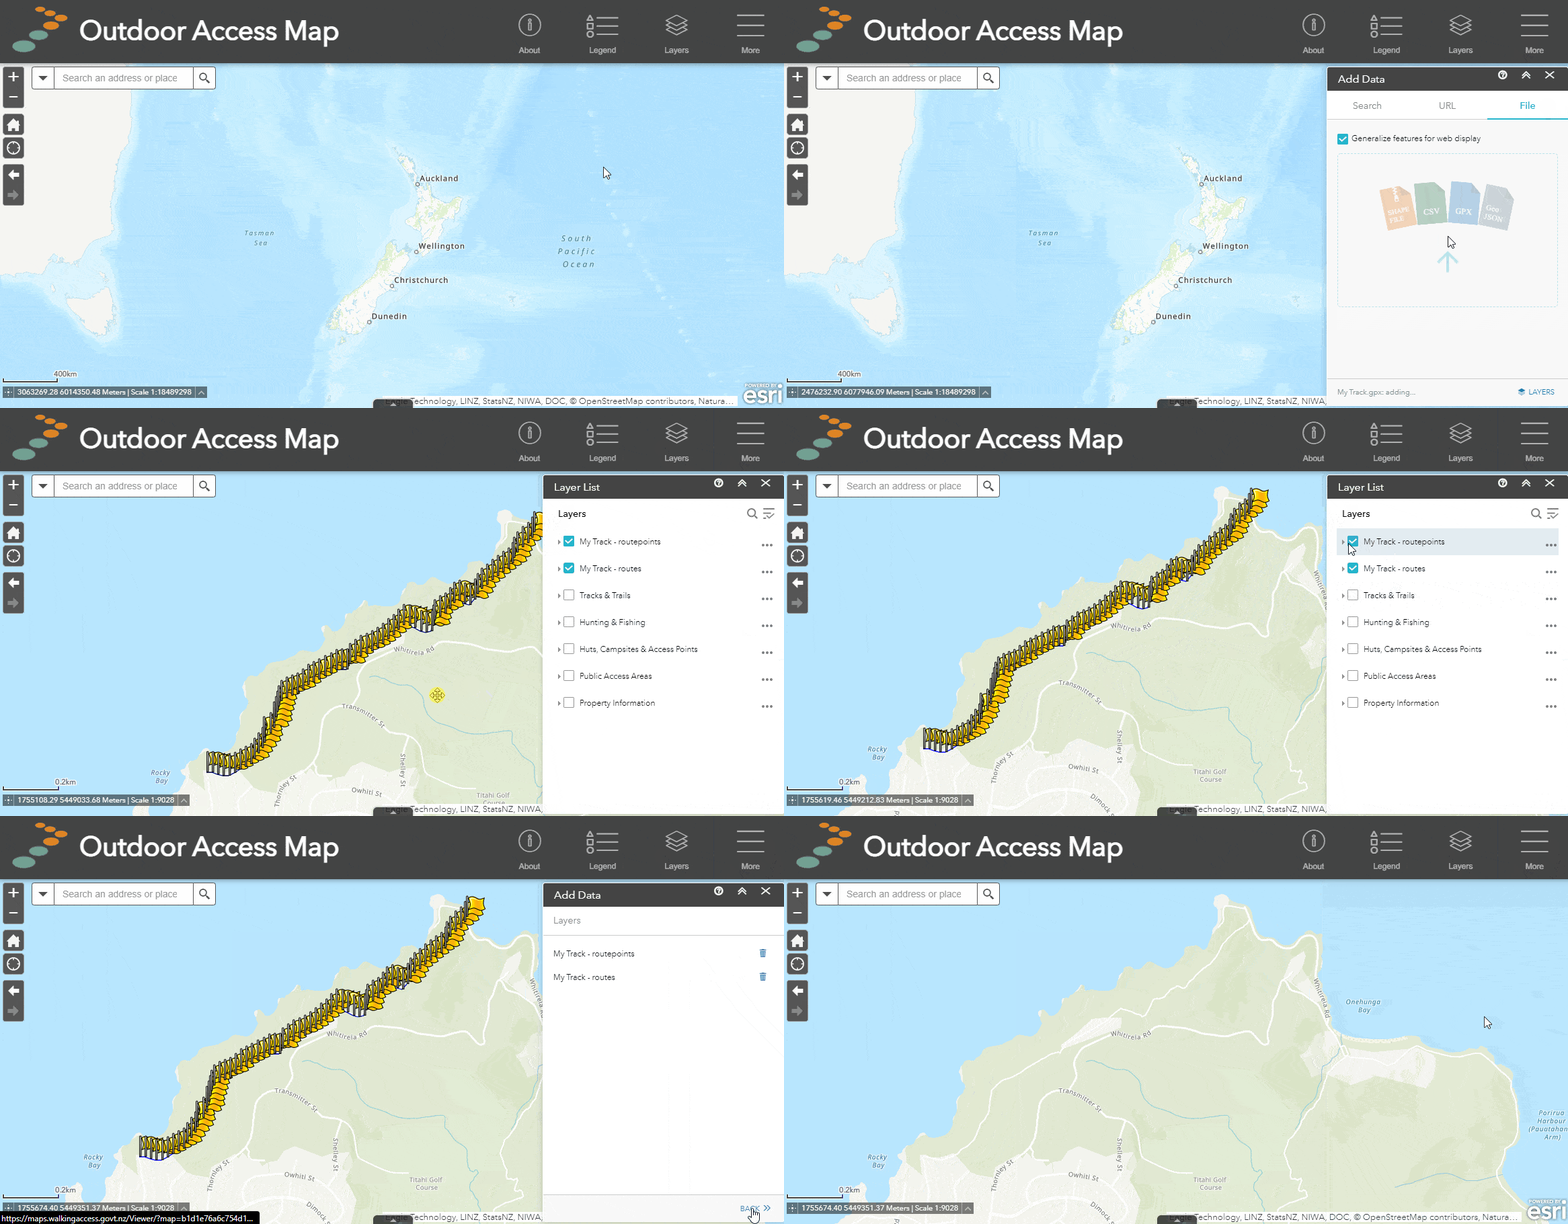
- From the top menu, select File
- Click on browse to browse your computer for the relevant file. You can also drag the file to this area. Remember this must be either Shapefile, CSV, GPX or GeoJSON.
- The map will automatically pan to the location of your file and display in blue lines (line drawings), flags (points) and blue shaded objects (other shapes).
- To turn your added layers on and off, view the Layers list and toggle the on/off checkbox.
- To delete your added layer from the map, select the layers menu from the Add Data tool and click on the trash icon next to the layer to be removed.
Add data via URL
- Open Add Data tool from the tool menu
- Select URL from the top menu
- Choose the type of URL from the dropdown
- Copy your desired datasource URL and paste into the URL box
- Click add to add the data to the map viewer
- The map will automatically pan to the layer location
- To turn your added layers on and off, view the Layers list and toggle the on/off checkbox.
- To delete your added layer from the map, select the layers menu from the Add Data tool and click on the trash icon next to the layer to be removed.
Demo: adding a GPX file to the map

For more information on using GPX files with GPS units and Our Maps, check out our handy guide below.
Or

